Clinical Analysis
Wear-Proof Implant Drills: Myth or Truth?
Solid tungsten carbide drills, Crown Down sequencing and the safety problem of conventional ascending osteotomy preparation.
 Written and clinically reviewed by Dr. Zvi Fudim, DDS, dental surgeon and founder of Crown Down Inc.Clinically reviewed: September 2026
Introduction
It is no secret that dull implant drills are among the most annoying events an implant dentist can encounter. Even when the manufacturer’s recommendations are followed, no one can guarantee that hard-bone cases will not challenge a surgical kit from time to time. Most implant drills are made of stainless steel, which is not the hardest metal for such an abrasive material as bone. Human and animal bone contain a high mineral component, and the mineralized portion makes bone a demanding cutting substrate.
In vitro testing of steel implant drills on dental stone produced disastrous results: after only twenty 3 mm-deep osteotomies, the cutting edge had transformed into a wide surface rather than a sharp cutting edge (Fig. 1, Fig. 2). Drill wear and drill geometry are known factors in cutting efficiency and heat generation during implant site preparation[1,2,3,4,5].
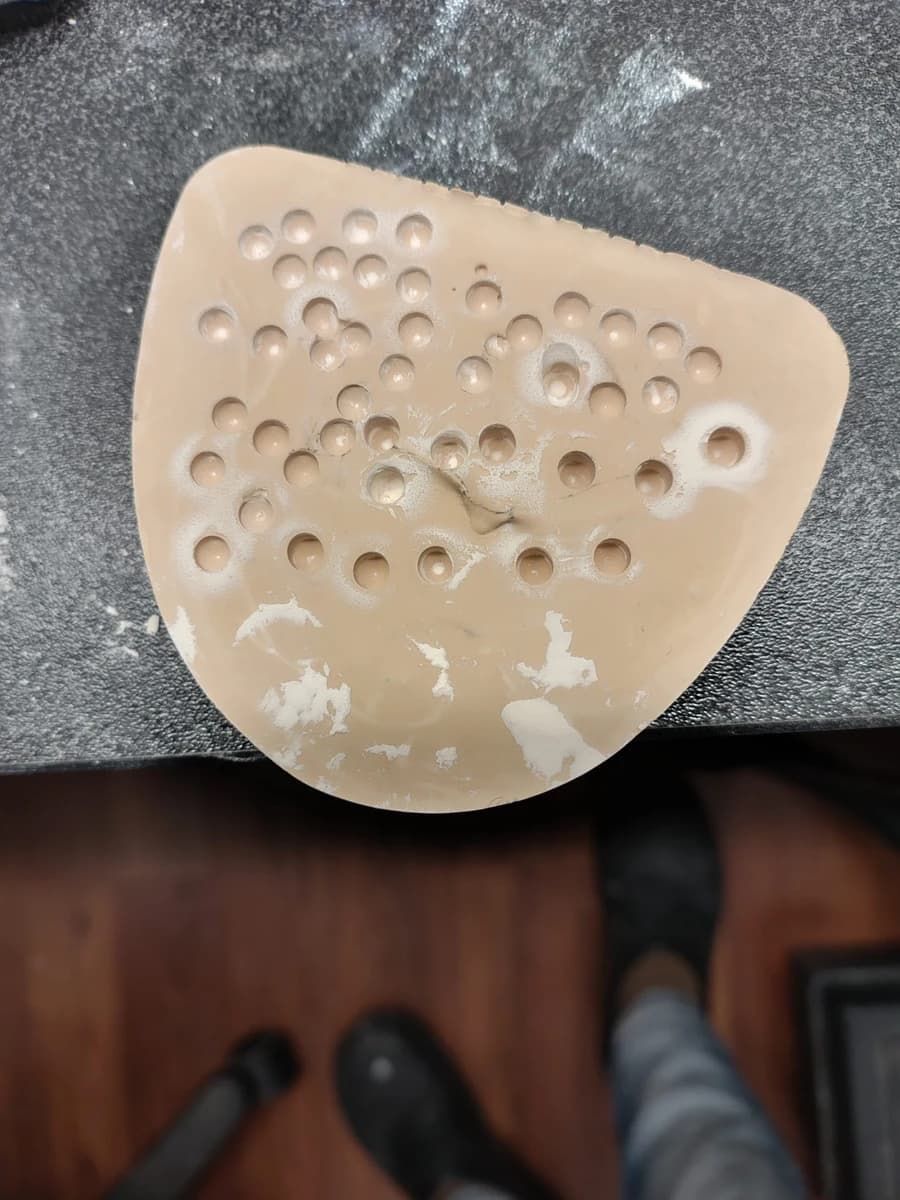
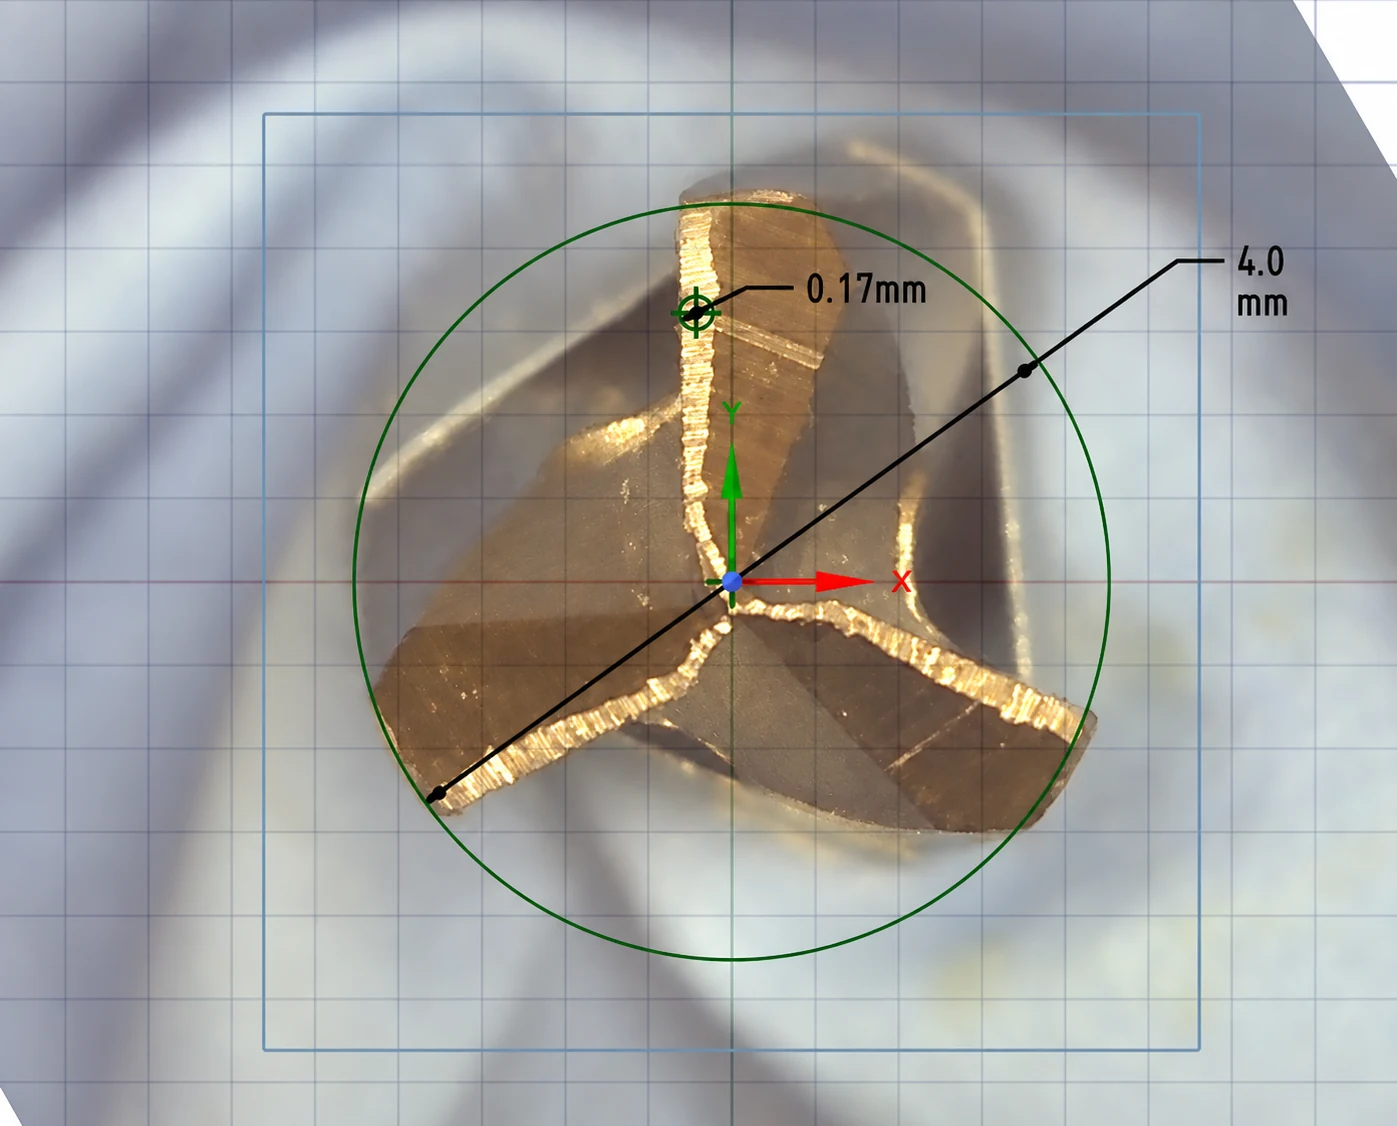
For a deeper mechanical account of what actually happens to the cutting edge of a steel implant drill under normal clinical loading, Crown Down publishes a dedicated article on why implant drills dull. The dental-stone test above is a compact illustration; the full accelerated wear methodology used to challenge Crown Down carbide drills - workload calculation, 3× safety factor, 50,000 rpm CNC acceleration, and microscope-level edge measurement - is documented in How We Test Crown Down Drills.
Are there cutting-tool materials besides steel?
Steel is a functional cutting material, but it is not the strongest performer for hard-material cutting applications. In machining, aerospace, and mining industries, the material of choice for precision cutting has long been tungsten carbide. Tungsten carbide was originally introduced in the 1920s by the German company Krupp under the registered trade name WIDIA, an acronym for “wie Diamant,” meaning “like diamond.” It was developed as a sintered carbide material for heavy-duty metal cutting and machining, and the name reflected its diamond-like hardness and high wear resistance[6].
However, an ascending drilling sequence creates a serious safety problem when the drills are made from solid tungsten carbide. Tungsten carbide provides exceptional hardness, wear resistance and thermal conductivity, but it is also a brittle material. Unlike stainless steel, tungsten carbide does not plastically deform to absorb excessive lateral, bending or torsional stress. When overloaded, especially in a small diameter, the drill may fracture suddenly. This is the key reason that the material cannot simply replace steel in the same conventional pilot-to-final sequence.
The head-to-head material contrast - hardness, thermal conductivity, fracture behavior - is treated in more depth on the Crown Down carbide vs. steel implant drills page.
How does inverting the drill order make carbide implant drills safe to use?
The Crown Down Kit solves this safety problem by reorganizing the drilling sequence according to the mechanical properties of tungsten carbide. The kit does not simply reproduce the traditional sequence in reverse, and it does not require drilling down to 2.0 mm. The smallest implant diameter supported by the kit is 3.2 mm, and the drills are selected according to implant diameter and bone zone rather than by repeating the conventional pilot-to-final ascending sequence. For a 3.2 mm implant, the small drill should be 2.75 mm.
For a 4.8 mm implant, the Crown Down Kit first uses a larger-diameter cortical drill corresponding to the implant diameter. This larger drill is mechanically stronger and much more resistant to bending and torsional overload. It is used first to clear or relieve the dense cortical resistance, where the drilling load is highest.
Only after the cortical resistance has been reduced are smaller tungsten carbide drills used to prepare the deeper trabecular portion of the osteotomy. At that stage, the smaller drill is no longer required to cut through the full resistance of the cortical bone. It operates under safer mechanical conditions, with reduced binding, reduced lateral stress, reduced torsional overload and reduced risk of sudden fracture.
Therefore, the Crown Down Kit is not merely the use of tungsten carbide as a drill material. It is the architecture of the kit that makes the use of solid tungsten carbide implant drills safe and practical by matching the drilling order to the mechanical behavior of tungsten carbide. The largest and strongest drill is used first where bone resistance is greatest, while the smaller drills are used only after the dangerous cortical resistance has been relieved.
This solves the safety problem that would exist if solid tungsten carbide drills were used in a conventional ascending sequence. In that conventional sequence, the small tungsten carbide drills, especially 2.5 mm and 3.0 mm drills, are likely to be exposed to unsafe mechanical stresses and may break. In the Crown Down Kit, the sequence avoids overloading the smallest drills and reduces the risk of brittle fracture inside the patient’s bone.
Accordingly, the novelty of the Crown Down Kit lies in the combination of solid tungsten carbide implant drills with a Crown Down architecture specifically designed to avoid brittle fracture and improve safety. The kit enables the safe clinical use of tungsten carbide in implant osteotomy preparation by matching drill diameter, drilling order and bone resistance to the mechanical limitations of the material.
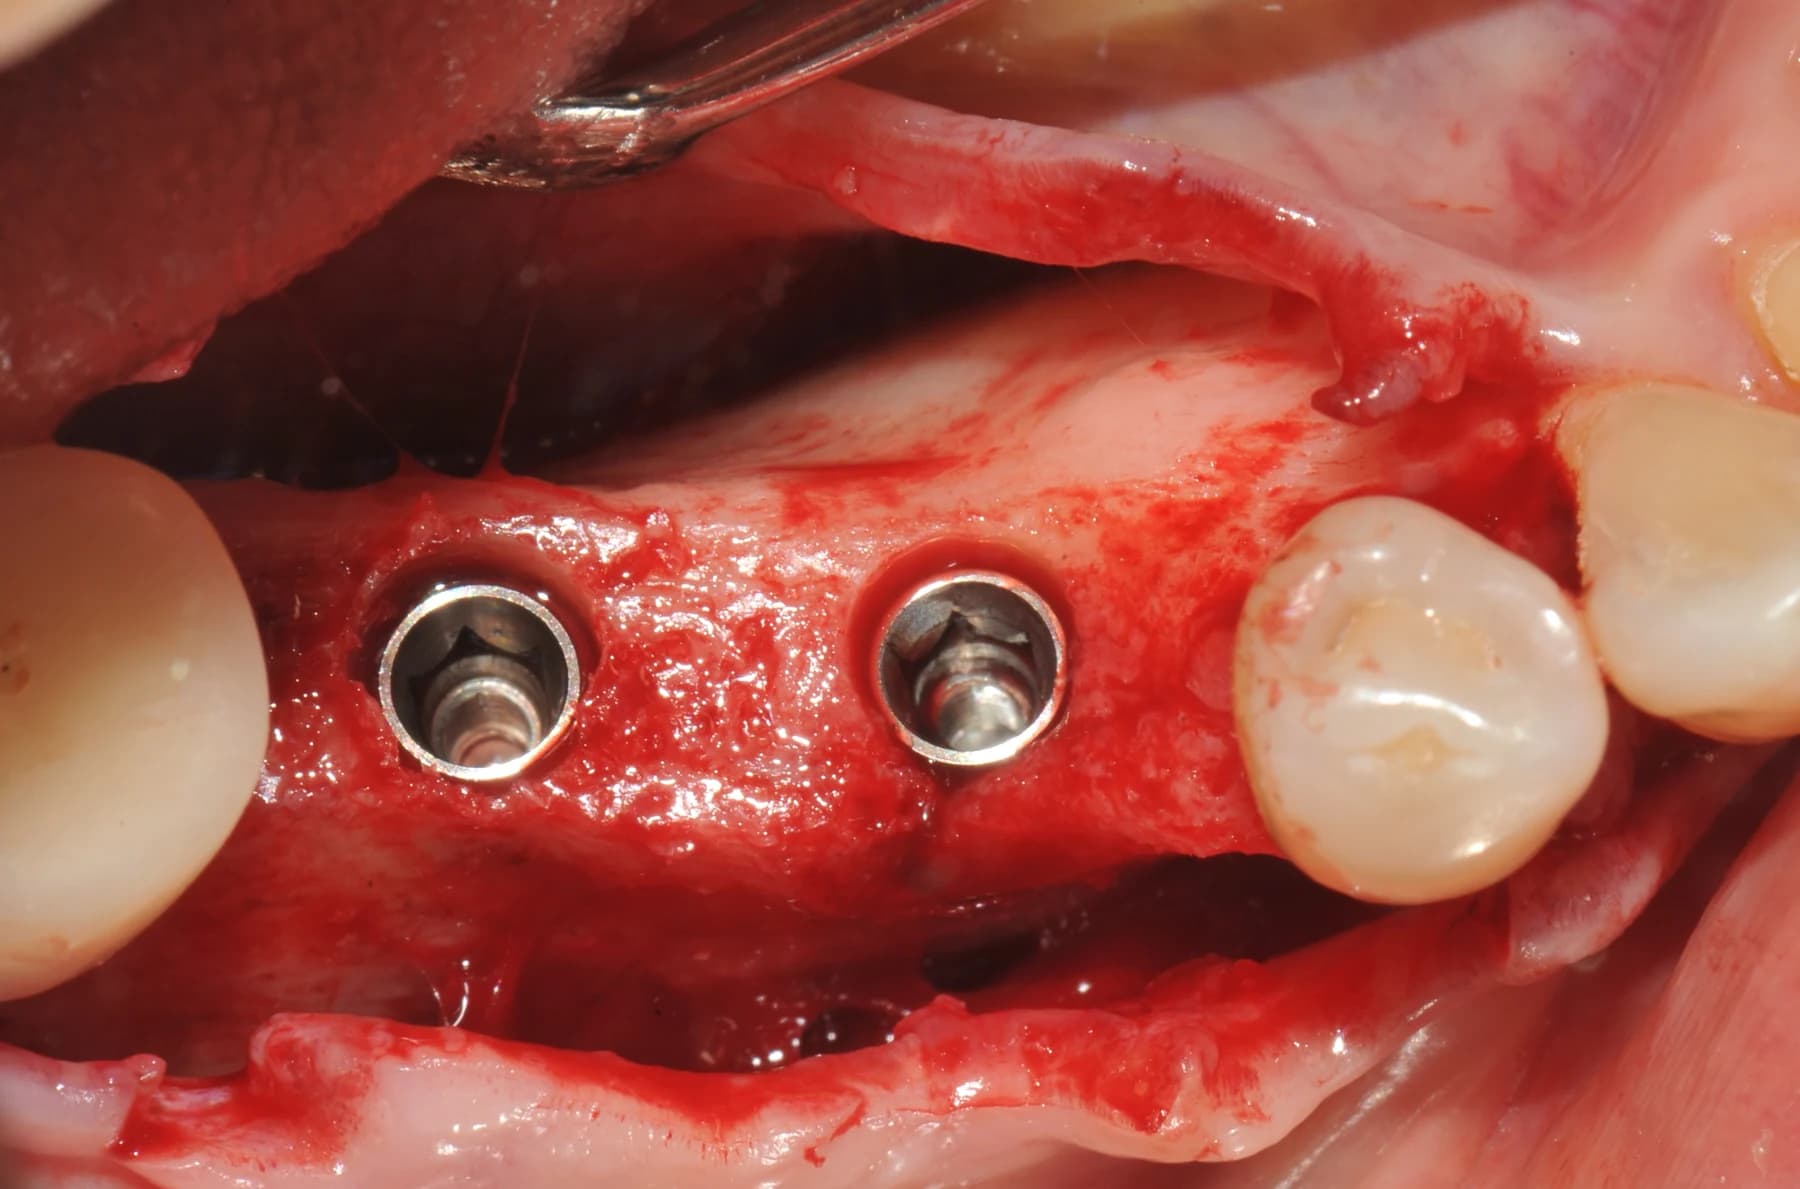
Crown Down publishes a full clinical walkthrough of the sequence described here on the 2-drill protocol page, including the diameter chart that maps implant size to drill #1 and drill #2. The instruments themselves are covered on the cortical drill page and the broader dental implant drills reference; the full tray configuration is described on the surgical implant kit and guided implant drill kit pages.
How does osseocompression create primary implant stability?
With the Crown Down method, drilling is performed in two distinct stages. First, the cortical bone is prepared according to the coronal requirements of the implant site. Then the deeper trabecular portion can be prepared with a smaller-diameter drill, allowing controlled undersized drilling where compression is actually useful.
In other words, the cortical obstacle is addressed first. Once the cortical portion is properly cleared, the clinician can use the elastic potential of the trabecular bone more effectively. The implant can then condense the trabecular bone during insertion without being excessively blocked by the dense cortical plate. The blockage of the implant by the cortical bone often results in what is called a “spinner,” a disastrous event that requires implant removal and restarting the osteotomy or postponing the procedure.
The mechanical difference between cortical resistance and trabecular compression is central to the rationale of the Crown Down sequence. Crown Down publishes a dedicated technical comparison of osseodensification vs. osseocompression for readers who want the deeper mechanical treatment.
Irrigation and autogenous bone graft
The exceptional physical properties of tungsten carbide, such as sharpness and high thermal conductivity, allow the material to cut efficiently at low RPM, roughly five times the cutting capacity of steel drills in comparative testing. Under the Crown Down low-speed bench protocol, cutting-edge temperatures on animal-bone substrate stayed within the range described by the classical heat-necrosis reference literature without continuous saline irrigation. Human clinical outcomes were not measured; clinicians should refer to the current Crown Down IFU for case selection and irrigation requirements. The classic temperature threshold for heat-induced bone tissue injury remains an important reference point in implant osteotomy literature[1,2,7].
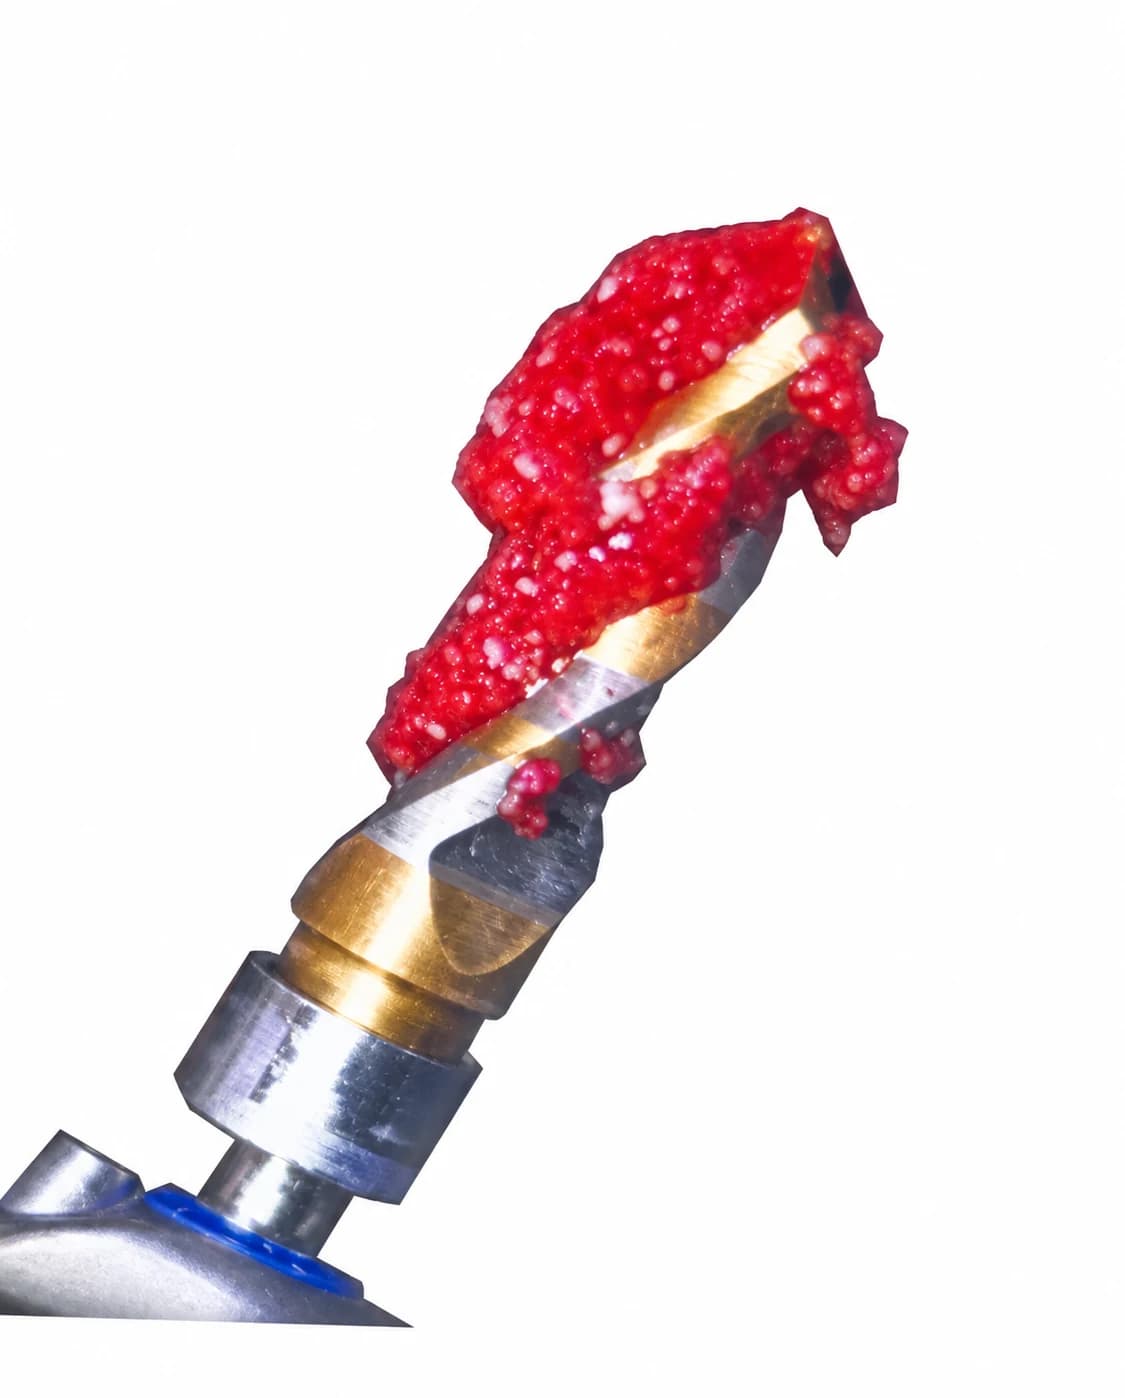
One of the biggest challenges in collecting autogenous bone is the abundant amount of irrigation. Saline dilutes bone chips, which then rapidly move to the suction system. Bone-chip traps were ineffective and not safe; they are no longer in routine use. Large Crown Down drills are excellent bone collectors (Fig. 4). They can even be used to collect autogenous bone from other sites, not necessarily only from the osteotomy. The collected bone is healthy and contains blood plasma and cellular components. Autogenous bone is widely valued because it contains mineralized matrix, cells and biological factors that may contribute to bone regeneration[8,9,10].
Because carbide drills do not require irrigation, the need to bypass coolant through the guide baseplate and guide tubes is no longer present (Fig. 5). Recent studies discuss irrigation drawbacks, including poor lubrication of cutting instruments in certain situations, washing out growth factors and cell content, prolonging the inflammation phase of healing, increasing postoperative pain and creating other soft- and hard-tissue problems. Drill material, drill design, drilling speed, irrigation and repeated use all influence heat generation and drill wear[3,4,5,7,11,12,13].
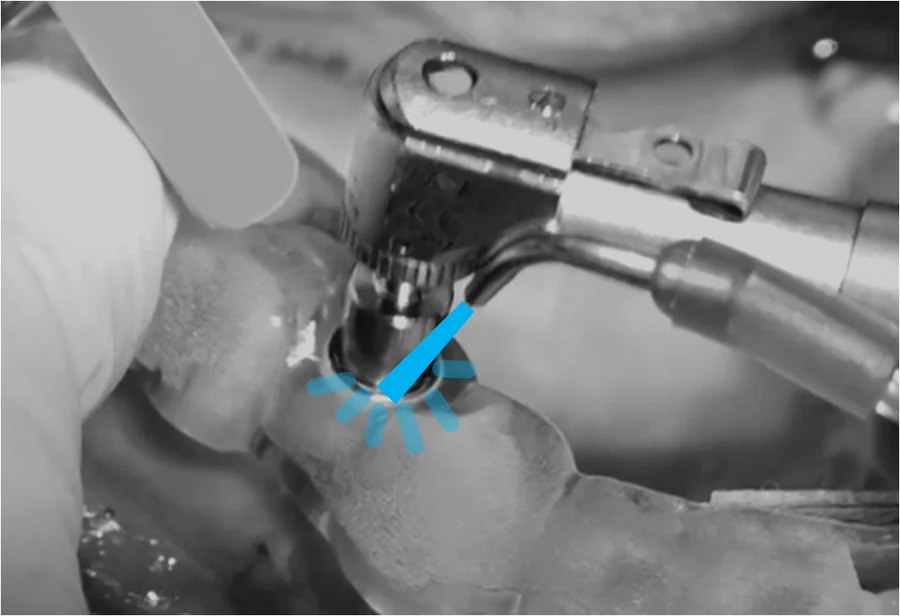
The specific problem of saline reaching the cutting edge through a surgical guide sleeve - and why heat conduction through the drill material solves it at the source - is the subject of a separate technical piece on heat in guided implant surgery.
Summary
A 100% wear-proof implant drill probably does not exist, but tungsten carbide drills are definitely wear resistant, especially when compared with steel implant drills. It also requires a major change in the drilling protocol, renouncing the conventional pilot-to-final ascending drilling protocol.
For very experienced practitioners who are used to the traditional workflow, it might be a serious challenge. There are also many other advantages, such as no need for irrigation, low- speed drilling as well as time savings. Another limitation of the Crown Down method is the option to correct the direction of the osteotomy upon a testing-pin X-ray, although preliminary planning with CBCT and especially guided surgery assures high predictability.
Autogenous bone collection is a separate bonus that comes with this method of work; it is very practical and simple. The collected bone quality is excellent and it is a sufficient quantity for filling up small to medium deficiencies. All in all, it is an interesting take on implant osteotomy, especially because the traditional drilling protocol hasn’t changed in the last 60 years. However, like anything new, it needs more time and clinical evidence. The Crown Down idea is pretty simple, and it definitely works for people who aren’t afraid of change.
Frequently asked questions
Quick answers to questions clinicians ask most about this topic.
References
Full bibliography as cited in the article above. Direct DOI links where available.
- [1] Eriksson AR, Albrektsson T. Temperature threshold levels for heat-induced bone tissue injury: a vital-microscopic study in the rabbit. Journal of Prosthetic Dentistry. 1983;50(1):101-107. doi:10.1016/0022-3913(83)90174-9
- [2] Chacon GE, Bower DL, Larsen PE, McGlumphy EA, Beck FM. Heat production by 3 implant drill systems after repeated drilling and sterilization. Journal of Oral and Maxillofacial Surgery. 2006;64(2):265-269. doi:10.1016/j.joms.2005.10.011
- [3] Mishra SK, Chowdhary R. Heat generated by dental implant drills during osteotomy: a review. Journal of Indian Prosthodontic Society. 2014;14(2):131-143.
- [4] Mühlhenrich SC, Modabber A, Steiner T, Mitchell DA, Hölzle F. Heat generation and drill wear during dental implant site preparation: systematic review. British Journal of Oral and Maxillofacial Surgery. 2015;53(8):679-689.
- [5] Oliveira N, Alaejos-Algarra F, Mareque-Bueno J, Ferrés-Padró E, Hernández-Alfaro F. Thermal changes and drill wear in bovine bone during implant site preparation: a comparative in vitro study of twisted stainless steel and ceramic drills. Clinical Oral Implants Research. 2012;23(8):963-969.
- [6] Thyssenkrupp. Krupp changes in production: launch of WIDIA carbide in 1926. Company history resource.
- [7] Bernabeu-Mira JC, Pellicer-Chover H, Peñarrocha-Diago M, Peñarrocha-Oltra D. In vitro study on bone heating during drilling of the implant site: material, design and wear of the surgical drill. Materials. 2020;13(8):1921. doi:10.3390/ma13081921
- [8] Coyac BR, Sun Q, Leahy B, et al. Optimizing autologous bone contribution to implant osseointegration. Journal of Periodontology. 2020;91(12):1632-1644. doi:10.1002/JPER.19-0524
- [9] Bernabeu-Mira JC, Peñarrocha-Diago M, Canullo L, Camacho-Alonso F, Cortes ARG, Peñarrocha-Oltra D. Autologous bone harvested during implant bed preparation: a randomized clinical trial comparing high-speed drilling with irrigation versus low-speed drilling without irrigation. Clinical Implant Dentistry and Related Research. 2024. doi:10.1111/cid.13346
- [10] Burchardt H. The biology of bone graft repair. Clinical Orthopaedics and Related Research. 1983;(174):28-42.
- [11] Gehrke SA, Bettach R, Taschieri S, Boukhris G, Corbella S, Del Fabbro M. Temperature changes in cortical bone after implant site preparation using a single bur versus multiple drilling steps: an in vitro investigation. Clinical Implant Dentistry and Related Research. 2015;17(4):700-707.
- [12] Chakraborty S, Moufti M-A, Kheder W. The effect of dental implant drill materials on heat generation in osteotomy sites: a systematic review. European Journal of Dentistry. 2024;18(1):65-72. doi:10.1055/s-0043-1768472
- [13] Falisi G, Severino M, Rastelli C, Bernardi S, Caruso S, Galli M, Lamazza L, Di Paolo C. SEM-EDX analysis of metal particles deposition from surgical burs after implant guided surgery procedures. Coatings. 2022;12(2):240. doi:10.3390/coatings12020240
Keep reading
Related reading
Explore related pages on the Crown Down dental implant drilling kit, protocol, and clinical science.
Testing Methodology
How We Test Crown Down Drills
The rationale behind our accelerated drill-wear challenge: a 30-year career workload, a 3x safety factor, and microscope evaluation of the cutting edge.
Read moreCarbide vs. Steel
Carbide vs. Steel Implant Drills
Hardness, heat, durability, and 5-year cost compared side by side.
Read moreProtocol
The 2-Drill Implant Osteotomy Protocol
How drill #1 and drill #2 prepare the implant osteotomy in two steps.
Read more