The 2-Drill Implant Osteotomy Protocol
Crown Down's 2-drill protocol prepares the implant osteotomy in two steps with solid tungsten carbide drills.

Protocol Walkthrough
How does the 2-drill implant osteotomy protocol work?
Drill #1, the cortical drill, prepares the cortical bone. Drill #2 completes the final osteotomy. Two passes per site, suitable for both guided surgery drill kits and freehand implant surgery.
Drill #1
Cortical Preparation
Drill #1 engages the cortical layer and establishes the osteotomy path. One step replaces the multiple pilot and intermediate drills used in conventional 5 to 8 step kits.
Drill #2
Final Osteotomy
Drill #2 completes the final osteotomy diameter for implant placement, indexed to the planned implant size from 3.2 to 6.0 mm.
Why Tungsten Carbide
What makes the 2-drill protocol possible?
Built-in thermal safety
Solid tungsten carbide conducts heat away from the osteotomy faster than steel. Up to 6x less heat in internal thermal testing under controlled conditions.
Guided & freehand
One kit covers both workflows: guided osteotomy preparation with 3D stoppers, and freehand surgery with tactile bone feedback.
No routine replacement
Solid carbide maintains its cutting geometry under normal clinical use. Routine drill replacement from progressive dulling is eliminated.
Clinical Proof
Heat testing & clinical imaging
Internal thermal testing and clinical imaging show predictable osteotomies with preserved bone vitality and clean, intact walls.
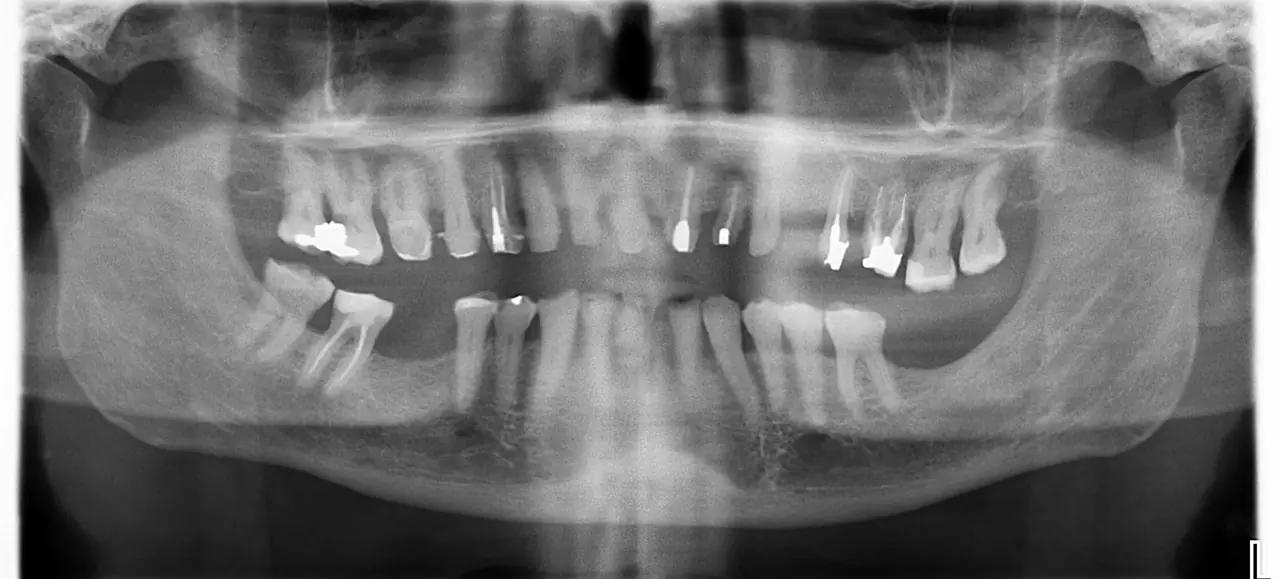
Before
Conventional drilling
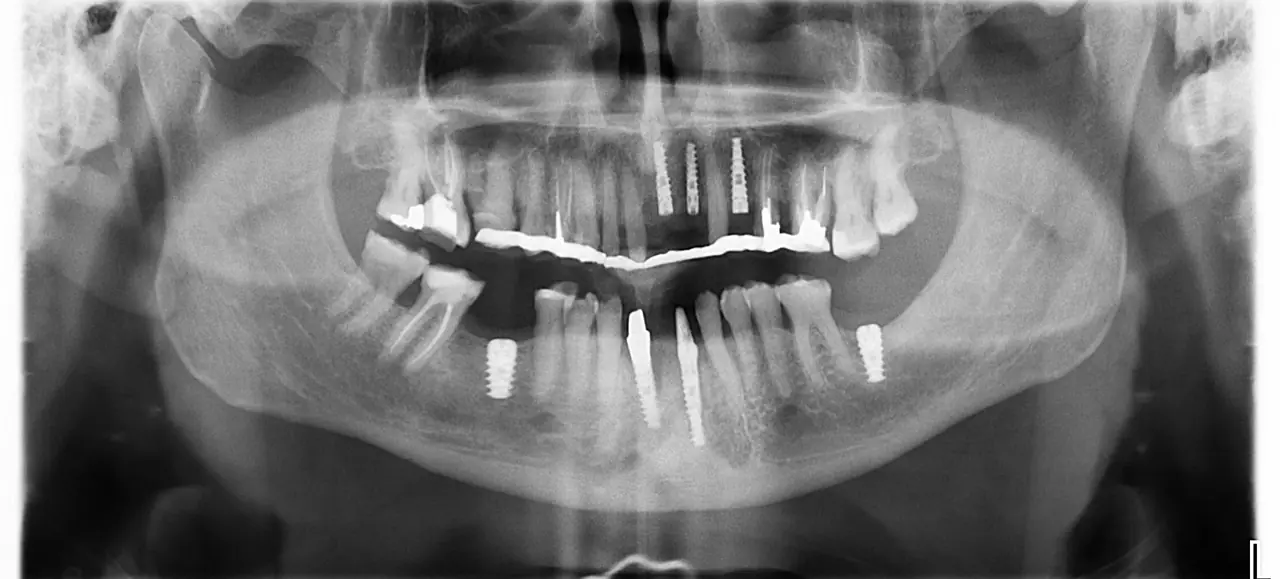
After
Crown Down method
In-vitro bovine rib testing shows minimal measurable cutting-edge wear after extended drilling cycles under controlled conditions.
Technique Clips
What does the 2-drill protocol look like in practice?
Drill Selection
Crown Down Drilling Chart
Two drills per site. Choose drill #1, the cortical drill, for crestal preparation and drill #2 to complete the osteotomy to final depth, indexed by the implant diameter you are placing. Both are Crown Down’s solid tungsten carbide dental implant drills, shipped on the surgical implant kit for freehand work or the guided implant drill kit for template-based cases.
The mechanical reason drill #1 is the larger of the two drills — not the smaller one, as in a conventional ascending sequence — is developed in the Wear-Proof Implant Drills clinical analysis. In short: solid tungsten carbide is brittle, so the smaller drill must never be the one facing full cortical resistance.
| Implant diameter (mm) | Drill #1 (cortical) | Drill #2 (final) |
|---|---|---|
| 3.2 / 3.3 / 3.5 | #35 | #20 |
| 3.75 / 3.8 / 4.0 | #40 | #30 |
| 4.2 / 4.3 / 4.5 | #45 | #35 |
| 4.75 / 4.8 / 5.0 | #50 | #40 |
| 5.2 / 5.5 / 6.0 | #60 | #45 |
Depth Marking
How do you read the depth markings on Crown Down drills?
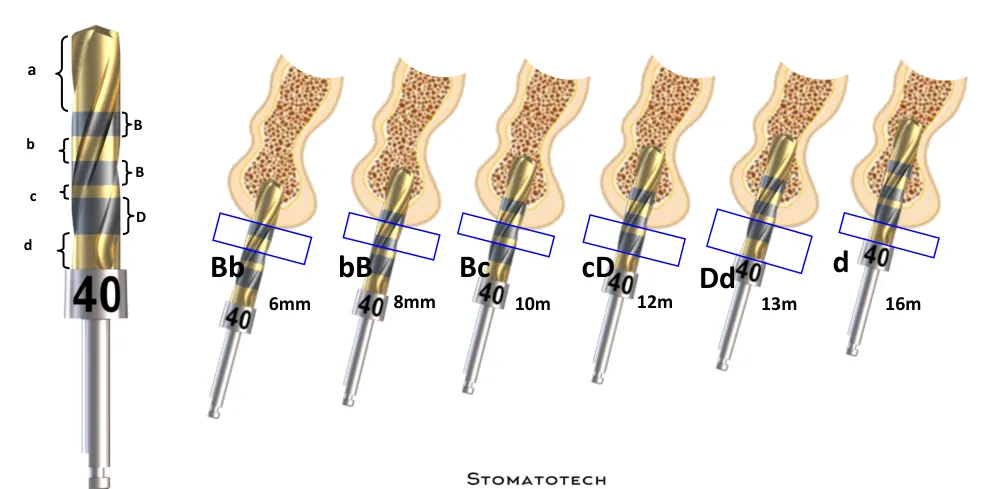
Crown Down drills are laser-marked with a letter code (a / B / b / c / d) so you can read working depth at a glance during osteotomy preparation. The diagram below maps each marker to a clinical depth in bone.
Frequently asked questions
Quick answers to questions clinicians ask most about this topic.
Keep reading
Related reading
Explore related pages on the Crown Down dental implant drilling kit, protocol, and clinical science.
Drilling Technique
The Crown Down Drilling Technique
The 2-drill tungsten carbide protocol for fewer steps and less heat.
Read moreCompatibility
Universal Implant System Compatibility
Drilling charts and user manuals for Nobel, Straumann, Zimmer, Astra Tech, Neodent, Camlog, and 20+ more.
Read moreProduct Catalog
Crown Down 2026 Catalog
Every kit, drill, SKU, and stopper in one printable PDF reference.
Read more